Showing posts with label Windows. Show all posts

Tuesday, April 11, 2023

// // Leave a Comment

How to Migrate a Team project from Team Foundation Server 2015, 2017, 2018 to Onprem Azure DevOps 2022?


Migrating a Team project or TFS Project collection from Team Foundation Server (TFS) to On-prem Azure DevOps Server involves several steps, including preparing the source TFS server, preparing the destination Azure DevOps Server, and migrating the data from TFS to ADO. Below are the general steps you need to follow.
 For this test, I am going o migrate only one Project collection from TFS Server 2015 to Azure DevOps Server 2022.
Before migration, please make sure that you are using the same version of SQL Server on both servers.

The version of SQL Server that you install must exactly match the version on the original server that hosted the databases. This requirement includes the service-pack level, the collation settings, and the language edition. If the match is not exact, you may be unable to restore the data, or Azure DevOps Server may not operate correctly even if you can restore the data.

  1. Make sure you back up your TFS databases before you start the migration. Before migrating your TFS server to Azure DevOps Server, make sure to back up your TFS databases. This will help you to restore your database if something goes wrong with your migration process.

  2. Prepare your Azure DevOps Server: Install and configure your Azure DevOps Server, create the necessary users, groups, and permissions, and set up SMTP Settings, Public URL, binding, SSH

  3. First Detach the TFS Collection on the TFS Server.


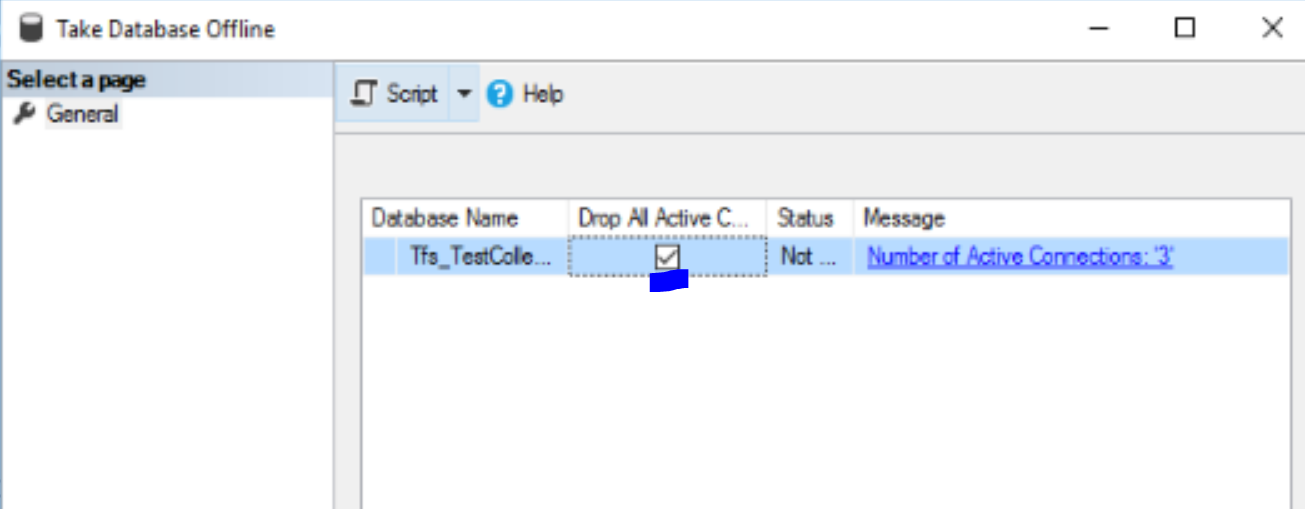
4.  Go to the TFS Server backend SQL Server and take the TFS Collection database Offline


5.  Now Copy the MDF and LDF files of the TFS Collection to the New Dev Ops Server backend   SQL Server and attach the database. 


6. Once you attach the database, Login to the Onprem DevOps Server 2022 and open Azure DevOps Server Administration Console, navigate to Application Tier->Team Project Collections and click on Attach Collection.


7.  Specify your DevOps SQL Server name where we attached the TFS 2015 databases and select your TFS Collection name and click next to attach Team Project Collection. This step takes 5 to 10 minutes depending on your database size.
Make sure you have a backup copy of your database in case something goes wrong with Migration This step changes the schema of your TFS Collection database to a format that is not usable on the previous version of TFS  or DevOps Server.

 8.  The migration tool will copy all the necessary data, including code, work items, test cases, and other artifacts. 

9. Verify your migrated data: After the migration is complete, verify your migrated data to ensure that everything has been migrated correctly. Check your code, work items, test cases, and other artifacts to ensure they are correct.

Read More

Monday, April 10, 2023

// // Leave a Comment

Assign the private key to a new Any new Certificate (GoDaddy)


Many of you tried to export certificate with private key and "export the private key" is greyed out during you export the certificate.

Many time I have faced issue with private key when I downloads the new certificate from GoDaddy or receive any certificate from my vendors. If you see grey out option for "export the private key" means the private key of the certificate cannot be exported after the certificate is enrolled.

So, there is workaround to solve this issue. 

1. Unzip the downloaded certificate files from GoDaddy.

2.  Copy certificate serial number by extracting certificate files. Cert file name is the certificate serial number.


3. Then open Command Prompt or Powershell in Administrator mode and type the below command. 

certutil -repairstore my "218xxxxxxxxxxx"

Change 218xxxxxxxxxxx with your certificate serial number.

Then your certificate will show Private key icon. Then from MMC-Certificates you can export certificate with key for that follow below steps.

1. Open Run and type MMC and click Ok.

2. Click on File->Add Remove Snap-in -> Click on ADD

3. Select Certificates-> Click Add

4. In Certificates tab select computer account and click Next. The select Local Computer and click on Finish.

5. In Certificate (Local Computer) click on the personal folder and certificates, select the certificate which you want to export with private key, and then select Export.


Then you can export the certificate with private key and you can install it on any computer/IIS.
Read More